Log
A feed of short updates and micro blog posts.
I created a little web app at countdown.matkv.dev that shows countdowns to some dates.
Ghostty
I decided to give Ghostty another shot after my first try back when it came out. Initially I was kind of turned off by the fact that it’s based on GTK when running it on Linux so it doesn’t really look native on KDE.
But in the meantime they at least changed the titlebar to look nice on QT (KDE), and since I’m not really using the tab functionality directly in Ghostty since i use Zellij for that, it actually does everything I need it to do. I don’t really see any killer feature yet that would differentiate it from WezTerm for my personal usecase - but then again I’m not really using any advanced features in WezTerm either.
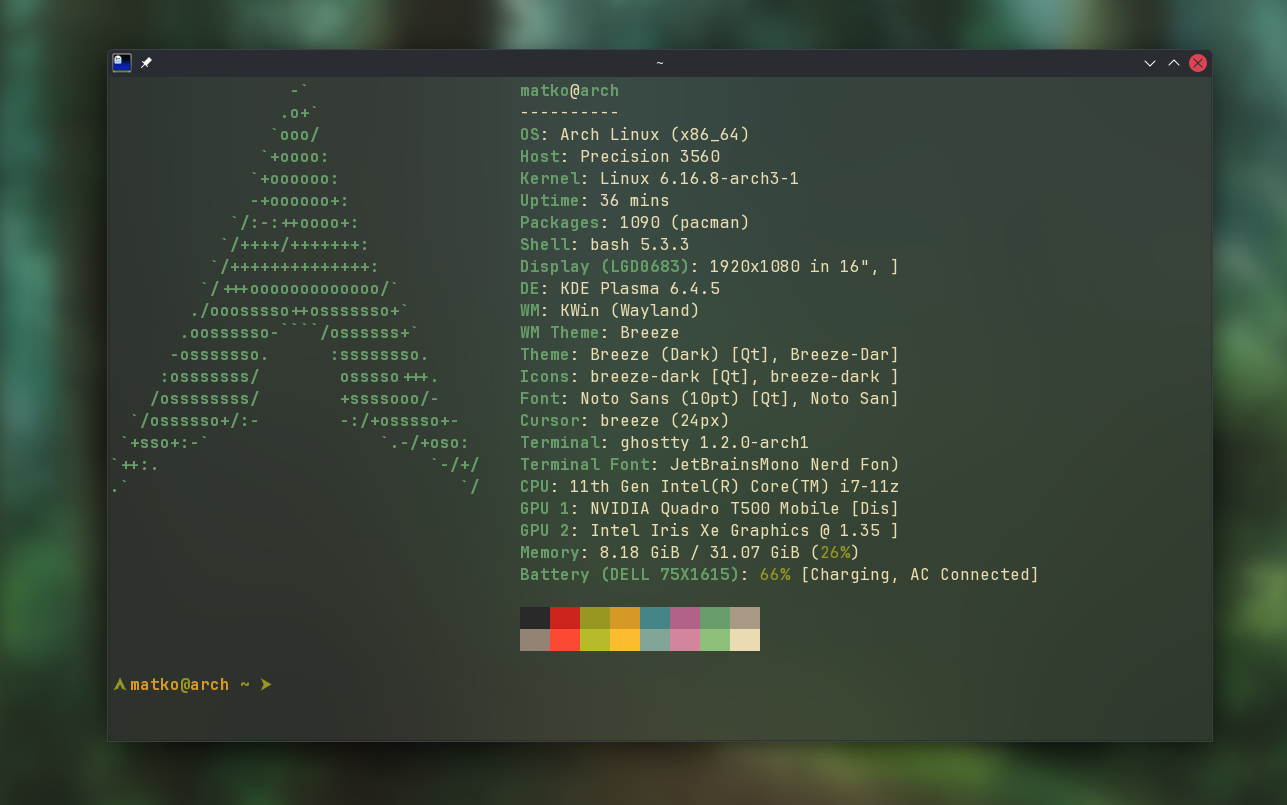
It’s possible that there’s some small issue with the column length for fastfetch, haven’t really checked that yet.
GitHub Copilot CLI
Another tool that I just started playing around with is GitHub Copilot CLI. I’ve already been using GitHub Copilot in VS Code and Visual Studio for like a year now, both with a personal subscription and at work, but this allows you to run it directly in the terminal.
It asks for permission to run any commands and you can set which working directories it has access to. It’s been pretty cool to just have it do some annoying or tedious tasks without needing to interact with it a lot. And since in most projects i track everything with Git anyways I’m not too worried about messing something up without being able to revert any changes.
Just earlier today I had it create a PWA for TeuxDeux on KDE even though Firefox doesn’t officially support it yet on Linux. It has been pretty cool to see it actually try and look up things like the icon for it online and it tried out a couple KDE specific commands to have the app show up in the application menu. Pretty impressive - I probably wouldn’t have bothered to make it work myself.
Overall I want to play around with it more but it seems like this opens up the usecases for Copilot quite a bit more for me.
Last week I bought two new VSTs during the summer sale of Native Instruments. Got some pretty good deals on them and I’m excited to play around with them and overall I’m trying to stick to my goal of practising music production more regularly.
Symphony Series Collection
A collection of a bunch of classical instruments - brass ensemble, brass solo, percussion, string ensemble, woodwinds ensemble and woodwinds solo.

Overall I’m pretty happy with how it sounds, the solo ones don’t blow me away but for the price I got it I can’t complain. This means I finally am also able to play around with writing some classical stuff since Ableton doesn’t offer a lot there out of the box.
The Grandeur Piano
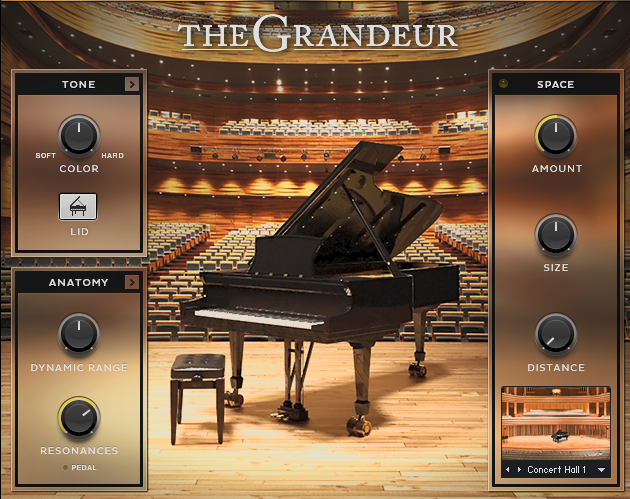
A piano VST - I’m actually suprised how nice it sounds and it’s definitely an upgrade over the built in pianos in Ableton. Also has a bunch of nice presets and the common things like pedal noise and different rooms for reverb. You can even open or close the lid of the piano which affects the sound. And I’m going to be using this one also just for general piano practice, not exclusively for music production.
I just set up a second site that I’m planning to use for random programming projects. It runs on Blazor and can be found at code.matkv.dev
As I’ve already written before, I’ve been struggling to find a programming project to work on regularly. So I thought instead of starting random projects and abandoning them after a while, I could try and build a setup that will allow me to try out smaller projects and display them nicely somewhere public.
I’ve decided to build a site with Blazor - I’ve wanted to play around with that anyways and it allows me to use C# (I’ve been trying to use C# for private projects as well, not only for work). And hopefully I’ll be able to set it up in a way that will make it comfortable to showcase some other small projects on there.
I need to clean up a lot of the boilerplate code that was added with the default Blazor setup and just overall learn more about Blazor and then, as a start, I’ll move all the projects from https://matkv.dev/projects over there so I can kind of separate this blog from programming topics - I’ve been meaning to do that anyways.
All in all, I’m curious how it will work out and what I’ll be able to build!
I haven’t been active on this blog for more than 8 months. I’m trying to change that now, so here are some ideas on what direction I want to take this blog in the future and what kind of content I want to focus on.
So far this blog has been mostly (with some smaller exceptions) been focused on tech & programming related content. I’ve decided that I am going to try to write about a wider range of topics - especially when considering that in the last couple of months - due to not having a project I’m really interested in - I haven’t been writing a lot of code in my free time anyway so that’s not where my focus currently is. And I also just want to make it a habit to write more in general, especially longer posts and stay consistent with it. Some ideas for future content are:
- habits / self improvement
- movie reviews
- literature (apart from my book reviews)
- fitness
- just general writing practice
- music production & guitar/piano stuff Overall I just don’t want to feel limited about what I’m putting on here - I will however most likely go through some of the stuff I’ve already posted here (especially things like notes) and decide if I still really need that on this website instead of just moving them over to my Obsidian vault where I keep pretty much everything else that is text-based but not actual code. I have quite a lot of different interests & hobbies and this blog could be a nice way of sharing what I’m currently interested in. There are also some areas on this website that need general improvement or just a bit of tinkering. I need to add some book reviews for books I’ve read since the middle of last year & I’ve been also thinking of maybe trying out some sort of micro blog where I post small updates of what I’m up to every now and then. Maybe this could replace the “now” page that I’m currently using. I’ve been looking at a lot of the blogs/websites from this webring and have been getting a lot of inspiration for stuff I might want to add to this site. Since I don’t have any other real programming pet projects (other than continuing learning Rust occasionally), at least I can improve some stuff on here - hopefully somewhat regularly. This is a random thought, but I’ve also decided to try to keep my GitHub commits low on weekends - or at least try to avoid doing too much on the computer on weekends and if I still do something - I want to at least try focusing on non-software dev related topics. At least on weekends. I’m already looking at a screen for 8+ hours a day at work & pretty much every weekday evening as well. So maybe restricting myself (when it comes to programming) to only Monday to Friday could be an option. Obviously this is not a hard rule - just a general intention. So yeah, I’m basically just rambling now but I’ll try to actually stick to updating this blog more regularly!
I’ve been interested in personal knowledge base systems recently. After reading about several different ones, I’ve decided to give Obsidian a shot & try moving all my existing notes there & set up an Obsidian vault from scratch.
Obsidian is a personal knowledge base that is based on markdown files. This is one of the main reasons why I wanted to give it a shot. While the software itself isn’t open source, it at least doesn’t use a proprietary format that would keep me locked into their system if they ever decide to give up development on the app.
The whole idea of Obsidian is to create links between notes in order to connect them by topic - this can then also be shown in a pretty fancy graph.
From playing around with it a bit yesterday & today, I’m pretty impressed so far. It has a couple nice plugins + support for community plugins - for example I already have one installed for Git integration which lets me comfortably back up this whole vault to a private GitHub repository.
I’m still deciding how to set it up in general & I want to make sure to only add notes & content that are actually still relevant to me now. I could probably also use Obsidian as my main way to write the content for this website - Hugo also uses Markdown files for the main content. So I could basically mirror everything on here & just publish the content that I’d actually want to be publicly accessible.
I’m curious if I’ll actually stick to it and continue using it. I really like the idea of having all my notes in one place.
So far this blog has been mostly just about updates on this website but kind of want to also write about other topics. So I thought I’d write a recap on my chess progress over the last year and how I’m planning to work on improving my chess in the future.
Lichess to Chess.com & back to Lichess
When I started playing again, I played around 130 games or so on Lichess, but then decided to switch to Chess.com as my main site (in part because those tournaments were all played on that site). So roughly from September 2020 to April 2021, I played pretty much exclusively on Chess.com. I even bought the Diamond premium membership which gave me unlimited puzzles and unlimited computer analysis of my games. Overall I played 390 games on there, mostly Rapid & Blitz games. After a while I noticed that actually overall prefered the UI on Lichess & basically all the features on the Diamond memberchip on Chess.com (unlimited puzzles, unlimited analysis, puzzle rush/streak) were available on Lichess for free so I decided not to continue my premium membership on Chess.com and switch back to Lichess. Another thing that I love about Lichess is that it’s completely open source, has no paid features at all & is actually funded by a non-profit so they literally don’t need to try & monetize the features on the site. As far as I know pretty much all new changes on the Lichess GitHub page are now written in Rust - maybe if I improve my Rust skills I’ll be able to help out there sometime. That would at least be an open source project that I’m really passionate about.
My progress over the last year
On April 5th 2021 - right around the time when I switched back to Lichess, my ratings were:
- Rapid: 1029
- Blitz: 851
- Puzzles: 1202
- Bullet: 1029 (didn’t play Bullet for the first couple months) My ratings today, on 7th of May 2022 are:
- Rapid: 1637 (+603) - my currently highest Rapid rating ever
- Blitz: 1327 (+476) - almost my highest ever (1330)
- Puzzles: 1773 (+571)
- Bullet: 1077 (+48) So in Rapid & Blitz I have been steadily making progress and improving my rating. I have the most games in Rapid (495 rated games), then Blitz (365 rated games) and then Bullet (210 rated games). Overall I’m putting my focus on Rapid chess, playing both the 10+5 & the 15+10 time controls. With Rapid chess I at least feel like my wins are actually earned because with the increment, games hardly ever end in flagging my opponent & winning on time. Recently I’ve however also enjoyed Bullet chess, but this is mostly just for the adrenaline of the quick time control ( I play 2+1) - I know that playing Bullet won’t really help me to improve a lot.
What I’m working on currently
While I have been improving overall, I feel like I’m often getting out of the opening in a worse position than my opponent because I’m mostly winging it and just playing moves that look good & develop my pieces. This is why I’ve decided to start actually working on my openings. I want to find at least one opening for white and one for black on which I can focus and really learn well. My notes while learning the openings can be found here. Unrelated, but today I found this fun website made by a fan of one of my favorite chess streamers/youtubers, Eric Rosen that analyzes all your games on Lichess and gives you a score based on how many fancy types of checkmates you managed to do, stalemate tricks, weird pawn structures and just generally fun achievements. It’s called Rosen Score. I got 27 “Rosen trophies” there :D
I changed the domain for this website! It can now be reached at matkv.dev. Previously it was my full name + “.com” but I decided to change it because I feel more comfortable sharing this domain on various sites without having to actually reveal my full name.
However, my old domain still works & now just redirects to this new one - I think I’ll keep paying for it just so that nobody else can steal it from me :D And it’s also nice to have a fairly professional looking email address that I can use this way.
The setup itself was a breeze, I was able to basically just copy the settings from my old domain and set them for the new one. So far everything works as expected.
A fun fact that I learned, when using a domain with the .dev top level domain, you apparently have to use https & a SSL certificate. But this was pretty easy to set up with my domain provider. All in all, I’m happy with the result!
I started learning Rust back in December 2021. Here is a quick summary of my current progress at learning Rust.
The main reason why I started learning Rust was that I wanted to learn a language that is a bit more low-level than the languages that I had been using so far. The first resource that I used was the official Rust book. Right now I’m at the 4th chapter - “Understanding Ownership”. This is the 4th out of 21 chapters, so I definitely still have a lot to learn :D I also started doing the Rustlings exercises to get a bit more comfortable with actually using the syntax. In order to not exclusively work on theory, I also just started my first actual Rust project. Basically I’m planning to rewrite my little tray bar program that plays a sound to wake up my studio monitor speakers in Rust. Currently I have separate versions for Linux & Windows so a cross-platform Rust solution might be a nice little beginner project, escpecially considering the program literally just plays a sound, nothing more.
The biggest challenge here so far has been getting the gtk dependencies that are needed to actually create the system tray icon to work. The repository for this little project can be found here. Overall, I think Rust is definitely interesting, the syntax can be a bit weird at times but I’m sure that’s something I’ll get used to.
After struggling to find ideas for side projects & not really being motivated about any of my current pet projects I have decided to try learning Rust.
Initially I was torn between getting back into Go (which I used very briefly about 2 years ago) and Rust but after reading up on both languages and looking at what kind of projects each language is generally used for, I decided to give Rust a shot. Considering that I use C# at work, I feel like learning Rust would be more benefitial to improving my skills as a programmer in general than Go. I never really used a language that is somewhat low level so this will definitely be a new experience for me. To be honest I’m pretty clueless about it right now but I’m looking forward to trying it out. Who knows if I’ll actually stick with it :D Today I will just set up the dev environment, the tooling seems to be pretty nice & there’s an official VSCode extension. I’m not sure where (or if) I’ll document the process and write notes in general.
I decided to give up on trying to get a productive NeoVim config set up anytime soon - I will instead try out LunarVim.
This is an IDE layer for Neovim that supposedly already has most of things needed for development with Neovim/Lunarvim configured by default. I guess I’ll just install that and then change the config where needed. I won’t be documenting the config process on here though, I think I’ll just add it to my README.md in the dotfiles repository..
I decided to try out Neovim so I will use this blog post to document the setup process. My main goals are:
- Automate the setup process as much as possible so that I can easily reuse my configuration on a different computer.
- Setup an built-in file browser and a nice theme (maybe the palenight theme)
- Setup code completion for my most used languages, maybe try C# first
TO-DO
- Install some plugin to show a file tree on the left side
Introduction
After installing Neovim (on Manjaro Linux: sudo pacman -S neovim) I can start it with the command nvim.
I created an init.lua file in my dotfiles repository and symlinked it to the location of the actual Neovim config file:
ln -s ~/dotfiles/nvim/init.lua ~/.config/nvim/init.lua
This way I should be able to change my config and still be able to have some version control because it is in my dotfiles repository.
init.lua
We can configure Neovim using the init.lua file. For example, we can enable line numbers by adding this line to the config file:
vim.wo.number = true
Option levels
There are several option levels:
vim.o.{option}: global optionsvim.bo.{option}: buffer-local optionsvim.wo.{option}: window-local options Each option is specific to a level; for example - thenumberoption is only available in thewindow-localoptions.
Basic usage
I can open a file by just typing nvim filename in the console. To move around in the file I can use the h,j,k,l keys or just the arrow keys. :q (shift+colon and then q) to close a file :w to save it.
It is also possible to open a folder with nvim. Then the files and folders inside it will be shown as a list and I can enter the folders or files with the enter key.
With shift + w I can jump to the next word, with a upper case W I can jump to the next word delimited by spaces. By using the same combination with e instead, we can jump to the end of each word. And shift + b jumps back one word instead of forward.
Editing text
By hitting the i key, we enter insert mode. Now we can actually add and change text. With the command :u we can undo the last change we made.
Splitting the window
I can split the current window verticall by using the :vs command. This opens another vertical window to the right. The :split command would open one below. In order to move around between all open windows we can use the :W w command (colon W and then w). This cycles through all currently open windows. To close the currently open window I can use the normal :q command.
If I have the mouse enabled in the settings (init.lua), I can also just click a specific window to focus it and resize the windows by dragging with the mouse.
Using a plugin manager - packer
I created a new folder in my nvim folder called “lua” and a “plugins” folder in the new lua folder and a new file called init.lua. (I actually created it in my dotfiles repo and symlinked it to the actual config folder again).
So after creating the folder and file in the actual config folder I ran the command:
ln -s -f ~/dotfiles/nvim/lua/plugins/init.lua ~/.config/nvim/lua/plugins/init.lua
Now the file in my dotfiles repository is symlinked to the actual config file again. Then I cloned the repository of the packer plugin manager:
git clone --depth 1 https://github.com/wbthomason/packer.nvim\
 ~/.local/share/nvim/site/pack/packer/start/packer.nvim
Now we add the first plugin to the init.lua file in the plugins directory:
return require('packer').startup(function()
    -- Packer can manage itself
    use 'wbthomason/packer.nvim'
end)
I think this actually means that the plugin manager is basically adding itself as a plugin too. Now we have to reference this plugins folder in the actual init.lua file in the “root” directory (~/.config/nvim/init.lua)
In the initi.lua file:
require('plugins')
Now we open the init.lua file (in the actual config folder) in nvim and run the command (shift + colon) PackerInstall.
Installing a color scheme
In the plugins folder we add a reference to the github repository that holds the color scheme. In my case I will be using the “Nord” color scheme:
return require('packer').startup(function()
    -- Packer can manage itself
    use 'wbthomason/packer.nvim'

    -- Nord color scheme
    use 'shaunsingh/nord.nvim'
end)
And then we run PackerInstall again. Then in the normal init.lua file we need to set the color scheme:
vim.cmd('colorscheme nord')
After saving the file and opening nvim again, we should now see the new color scheme :)
Adding better syntax highlighting using treesitter
In the init.vim file in the plugins folder we add
    use {
        'nvim-treesitter/nvim-treesitter',
        run = ':TSUpdate'
    }
And then we install the treesitter plugin using the PackerSync command.
Adding treesitter support for all maintained languages
We add a reference to the treesitter config in the normal lua.init:
require('treesitter-config')
This basically means that the init.lua file will require any plugins/settings that are in init.lua files in the directories that are specified this way.
Then we create this treesitter-config folder in the lua folder. And in this new folder we create a new init.lua file. Now we can basically enable all languages that are “maintained” and supported by treesitter:
require'nvim-treesitter.configs'.setup {
  ensure_installed = "maintained",
  highlight = {
    enable = true,              -- false will disable the whole extension
    additional_vim_regex_highlighting = false,
  },
}
The next time we open nvim, it will automatically download and install all languages that are supported. Now the syntax highlighting should look a lot better when opening code.
Figuring out which option level a setting belongs to
In order to set settings in the init.lua file using lua syntax, we need to specify the option level, for example vim.wo.number'. In order to figure out which option level a specific setting belongs to, we can use the help command. For exmample, figuring out where the cursorline` setting belongs to:
:help cursorline
Now the settings page shows that cursorline is of type boolean and that it is local to window. This means we can set it using vim.wo.cursorline = true.